Showing posts with label Jewelry. Show all posts

Tuesday, March 19, 2013

Brass Bezel Bleedthrough

My 9th grade teacher would be so proud of my alliterative title! I can't remember her name, but I can see her in my head - a short, round woman with dark hair who couldn't believe how ignorant we were about grammar. Anyway...

I had some brass bezels on hand, and I purchased some Mod Podge Dimensional Magic at the new Joann Fabrics store that recently opened in Columbia, MO. I wanted something for quick narrow bezel fills and I had read about this product - I used a 50% off coupon so I could give it a try.

This was about 2 weeks ago, so I decided on a St. Patrick's day theme.  I cut an oval out of shamrock paper glued it down and filled it up with Dimensional Magic, waited overnight.  The next morning, it was a MESS. The ink bled through! Ugh! I didn't take a photo of that because the idea to blog about didn't come to me until after I took it apart.

When I stripped everything apart, it wasn't the ink on the paper that had bled, it was the brass on the bezel that had turned green. The pink arrows point out the greenest part but it still may be hard to see. But it was obvious in person.
Ugh! Green!
I scrubbed and sanded it clean, then coated the bezel with clear fingernail polish. Not sure if you can see the coat of clear polish either, but here is what the cleaned-up bezel looks like.
After a coat of clear nail polish
The nail polish was just what I needed. The next pour worked perfectly! I topped the shamrock paper with a 3D glitter shamrock sticker, and coated it again with Dimensional Magic. I made 2 this time, and the results turned out just like I wanted! 
Finished bezel pendants

This product won't totally replace using two-part epoxy resin, for one thing it is not self-leveling. But for quick little pendants like this, it works well. I hope this little coating tip helps you when you are working with raw metal bezels.

Saturday, February 2, 2013

Wellness Words Jewelry Challenge

Today's post is about Tracy Statler's Wellness Words Jewelry Challenge from her blog Make Bracelets! I love all of Tracy's blog posts and it's one of the few that I follow - I usually learn something from each one of them and I look forward to getting and email that there is a new one to read.

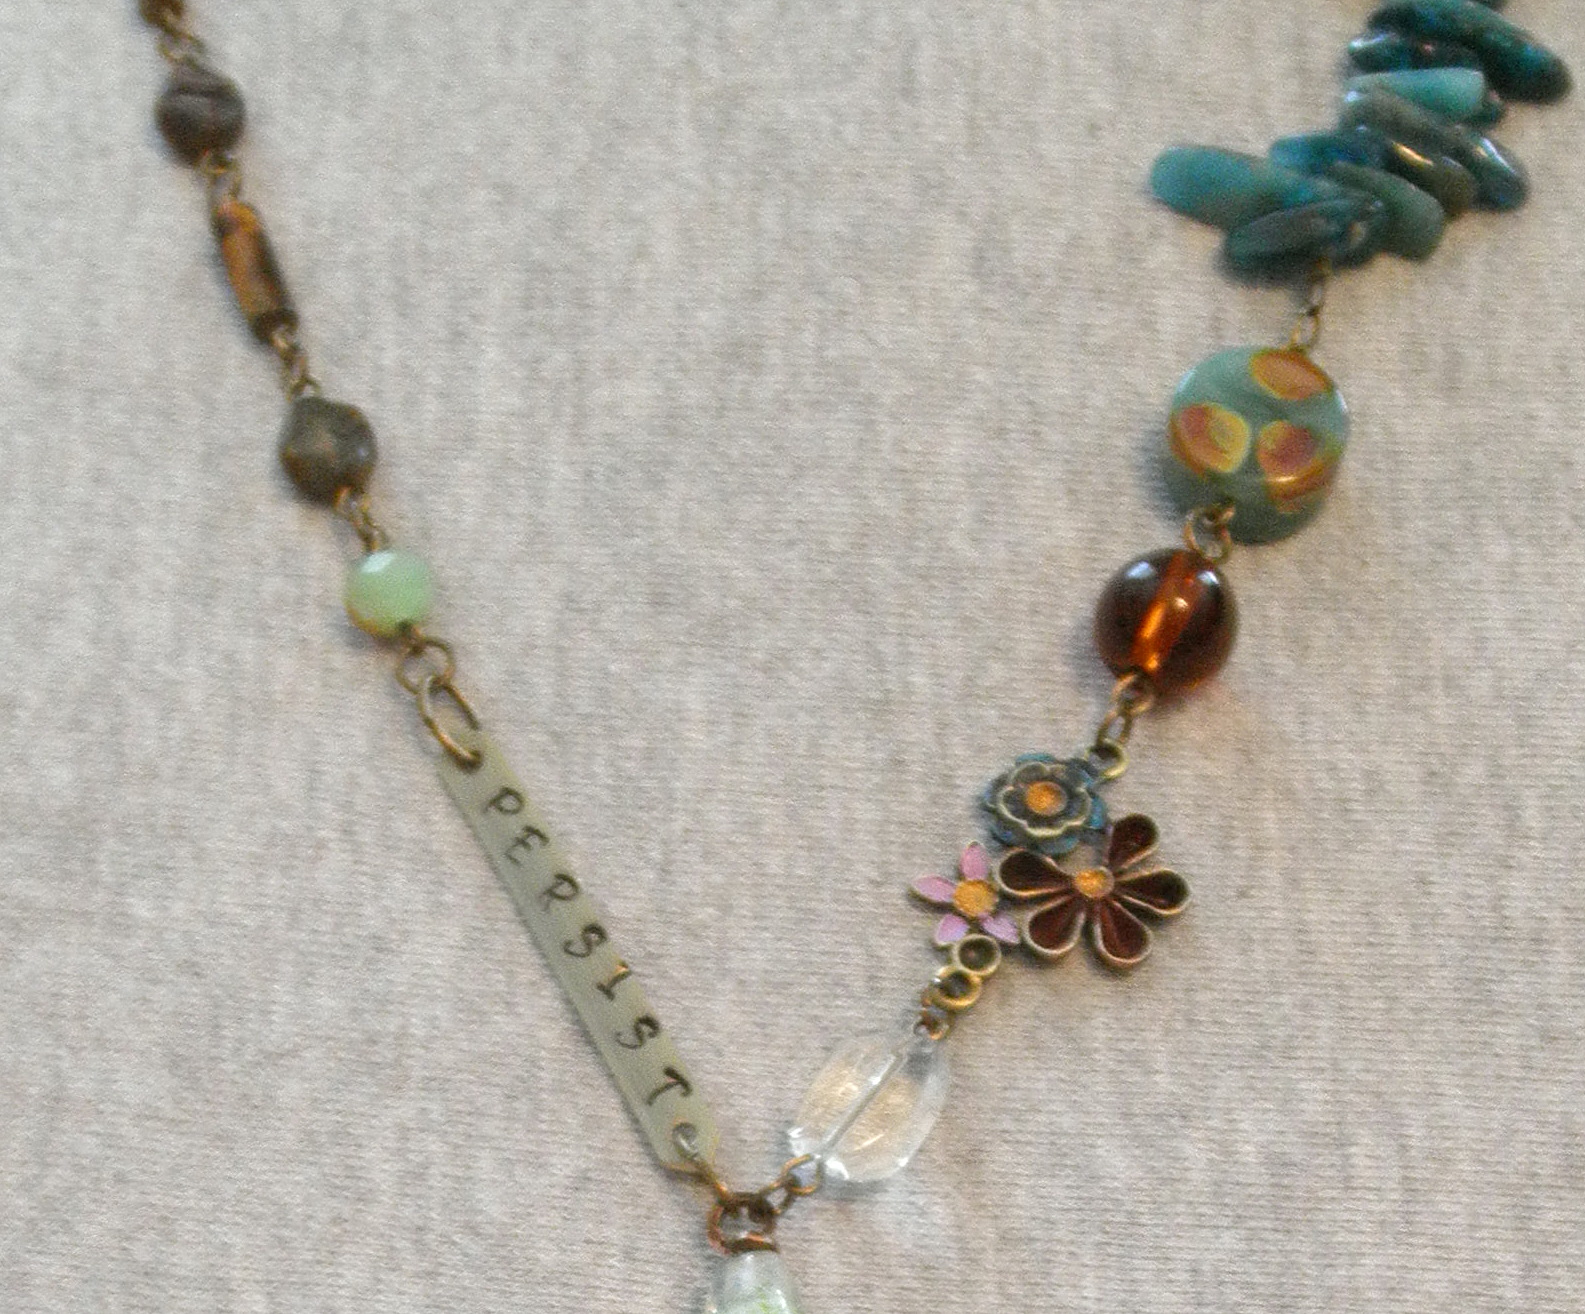
Tracy's challenge was to come up with an inspirational word or phrase in an area of your life where you want to make positive change. My word: Persist.  I have been working on finishing things that I start!

I knew I wanted to stamp my word on a strip of brass, which I had on hand. Another word I could have used - "Practice," because good, clear, even stamping isn't one of my strengths. You can probably tell by the position of the I.

Friday night was a prime example of persistence. I waited until the last minute finish this necklace (maybe my phrase should have been "Stop Procrastinating") and I thought about just saying to heck with the deadline. I mean, I had the phrase piece done. But I stuck with it for once!

However, it was too late to get a good photo. There is always a hitch, isn't there? So you are getting the best photo I could take tonight. I promise to get a better photo of the whole necklace, because it looks pretty good and there's lots more goodies to see than just this section.

EDITED: I'm back with more photos of the rest of the necklace. Originally, I was going to have the "Persist" Brass segment hang from the art bead and then the dangles hang from that, but it turned out way too long and in the end, I like it as part of the necklace anyway. The brass flowers were a plain connector that I colored with Vintaj Patinas and Tim Holtz Adirondack Alcohol Inks.The remainder of the necklace is finished with a combination of Picasso finish beads and Tiger Eye tube beads on the left, and Brown Glass bead, a polka-dot Lampwork Art bead, and Blue Peruvian Opal stick beads on the right.  The back end of the necklace ends with a brass chain and a toggle (OK fine! It *will* end with a chain and toggle, I promise!)

Complete necklace (left); Pendant and Dangle detail (right)

Please visit everyone else who participated in this challenge.
acreativeforce.blogspot.com
alankarshilpa.blogspot.com
allprettythings.ca
anniamaebisuteria.blogspot.com.es/
apolymerpenchant.com
beadlolabead.blogspot.com/
beadrecipes.wordpress.com
centsations.wordpress.com
clay-space.com/
creativeatelier.net
elliesbijoux.com
emakdesigns.com
erinsiegel.com
etsy.com/shop/shamaen
facebook.com/hotsouthernmessdesigns
facebook.com/soquilidesigns
fairiesmarket.blogspot.com
firstimpressiondesign.blogspot.com
gemsbyjudy.com
glasstastreasures.blogspot.com
handcraftedserenity.blogspot.com
humblebeads.blogspot.com
facebook.com/azuresunshines
facebook.com/whdalaska
jeanetteblix.com
kimmykats.com
kymhunterdesigns.blogspot.com
lisayangjewelry.com
macmillanmarie.blogspot.com
makebraceletsblog.com
miabellasoul.com
misheldesigns.com
mycreativechallenge.blogspot.com
noseycritters.blogspot.com
pixiloo.blogspot.com
sandivolpe.com
sharonsjewelrygarden.blogspot.com
shaterra.etsy.com
shinylittlethings.blogspot.com
shymedesign.se
shymessmycken.blogspot.se
simpleearthcreations.com
soultosubstance.com
suebeads.com
sunshinebliss.com
sweetbeadstudio.com
sweetwillowdesigns.blogspot.com
thebeadingyogini.com
thestudiosublime.com
treasures-found.blogspot.com
twitter.com/ldymlivelystone
vault31.blogspot.com
veradesigns.blogspot.com

Tuesday, January 1, 2013

Trying something new - Making Woolywire beads

I think I have mentioned before about the greatest jewelry group on Facebook called Creative Bead Chat (CBC). We share tons of creative ideas, tips and tricks. It's a great place for jewelry designers to be.

One day, CBC member Sandra McGriff posted a giveaway - she had been gifted beads and Woolywire from another CBC member and hadn't gotten around to using it, so she decided to give it away to someone in the group. And guess what, I won!

Woolywire is a product available from yet another CBC member Karen Totten (Etsy shop Starry Road Studio). According to the product description on Etsy, Woolywire is "fiber that has been hand dyed and hand spun onto 24ga solid copper wire can be shaped, twisted, coiled, wrapped, woven through chain, for your jewelry creations. It has been permanently felted to keep fiber fixed to the wire."

I received 3 feet of Woolywire in a mix of blacks and pinks plus 3 ceramic beads - two wavy tube pink beads and one black leaf bead. The curl of the wire in the package made me instantly think of making a Memory Wire bracelet.

I like to make chunky bracelets with Memory Wire, so I went to the stash and started pulling out all the pinks medium sized and a little larger. I did purchase one strand of purple, pink and pale yellow crinkle glass nuggets to tie it together, but the rest came from my stash (hooray). I ended up with 4 rounds of beads.

My original thought was to weave the Woolywire through the entire bracelet - a twist here, loop around a few beads, twist again, etc. etc. But I had made the bracelet too long for that plan! Plan B: cut the wire in fourths and make Woolywire beads.
Woolywire bead!
The Woolywire comes with detailed instructions on how to cut finish the ends, right on the packaging materials. I followed them to materials. I followed them to a T and it worked perfectly.

Instructions included

So here is the finished bracelet. I am very happy with how the beads and the bracelet turned out. I still want to try out the original plan of weaving the Woolywire throughout a bracelet, so I see another purchase in my future....


I am including a link so you can check out the bracelet in my Etsy shop.

Saturday, October 13, 2012

Reveal: My Bead Table Blog Hop

Today is the reveal for Lisa Lodge's My Bead Table Blog Hop. Lisa sent us a (large) package of random coordinating beads, and along with things in our stash (stash only! no purchasing! that was the rules), we were to use as much as we could and Create.

Finally, the package arrived and inside I found a large bag of glass, seed beads, gemstone chips, some findings and large acrylic petals. The color scheme? Hot Pink. Bright Yellow. Black. White. The acrylic petals were big, over an inch tall. She also included 2 chicken beads - that's right, CHICKENS. What am I supposed to do with chickens? 

Bawk, bawk!

I have never worked with acrylic beads, and bright pink and yellow aren't colors that I usually work with. Ever. Fortunately, they came about 4 weeks earlier so I had time. I put them aside, and every time I passed by them, I thought about what to do.

When October rolled around, I knew it was time to get started actually using the beads. Still confused about what to do with these bright beads, finally something hit me. It's October, and I have a mix of pink beads. I decided to make jewelry to commemorate Breast Cancer Awareness.

The first thing I made was a Memory Wire bracelet. Whew, already the pressure was lighter - I used a lot of beads on this one! P.S.: this is the photo I pixellated for my preview post earlier this week. I actually like this bracelet and the color combo! It turns out all I needed to do was just begin.
First design, Memory Wire bracelet

Then I started on a necklace. I wanted a long necklace with a dangling pendant. There was a large white Howlite bead that was perfect as the foundation for the pendant. I used a variety of beads to make the dangles of various lengths. To continue with the Breast Cancer Awareness theme, I made a beaded pink ribbon out of seed beads and 28 ga. wire. I have some interesting crinkle stringing wire from Beadalon that I used for the lower beaded part. To show off the wire, I used crimp beads to space the beads. The remainder of the necklace is silver tone chain, and I finished it off with an "S" clasp that was part of the bead mix. It is very long, hanging well past the bust line. Perhaps that's why I had a really hard time getting a photo of this necklace. I am still not happy with the final photos, and I may try again this weekend depending on the lighting.


Time to make some earrings. I used the leftover chain from the necklace to make a quick pair of pink and yellow drop earrings with the small rhinestone beads.
Drop earrings in pink and yellow
I used 2 of the peach acrylic petals for a second pair of earrings. At first, I tried to use an eyepin through the top hole with another loop lower on the pin. I bent the middle to match the curve of the bead. It didn't hang well AT ALL! It looked terrible. After about 3 times, I tried a jumpring through the top, and I attached the eyepin to that. That worked exactly like I wanted. I love the look of these earrings especially with the heart charm, but they clack a little when you wear them.

Peach acrylic petal and crystal drop earrings
 
This second necklace is my favorite. The pink and brown button above the acrylic petal and the black and white leaf button are part of a closeout set of wooden buttons that I got on Etsy. Along with a caramel colored crystal rondelle and various leaf beads in my stash, it works for me. I wish I could get the petal to quit spinning around. I am going to play with the jump rings some more this weekend.


I had one more project planned, but I just ran out of time. It is the last hot pink acrylic petal filled with resin and a Pink Ribbon oval with a few pink glitter hearts sprinkled in. I intend to finish it with a simple chain and a pink ribbon accent above the petal pendant.


These was one casualty - a broken glass heart...I broke it trying to tighten up the loop I made at the top. It split right in half! I wasn't happy either, I really wanted to use it. I guess I don't know my own strength.
My broken heart

All in all, I am happy with how everything turned out for this Blog Hop. I like the designs I came up with, I made 4 1/2 pieces of jewelry and I used a lot more beads than I ever thought I would when the package arrived that's for sure.

But I still don't know what I'm going to do with the chicken beads. If you know a chicken lover, let me know - I'll send you some beads.

Please be sure and visit all the Blog Hop participants to read their story and see their designs!

Host: Lisa Lodge, Pine Ridge Treasures
Molly Alexander, Beautifully Broken Me
Audrey Belanger, Dreams of an Absolution
Ginger Bishop, lilmummy likes...
Tanya Boden, Fusion Muse
Lisa Boucher, Lisa’s Clay Happenings
Michelle Buettner, Mishel Designs
Eleanor Burian-Mohr, The Charmed Life
Mikala Coates, Maybe Just Perhaps
Marlene Cupo, Amazing Designs
Kathleen Douglas, Washoe Kat's
Mary Anne Klinglesmith Flesch, Handcrafted Serenity  *you are here
Therese Frank, Therese's Treasures
Mary Govaars, MLH Jewelry Designs
Tanya Goodwin, A Work in Progress
Mary Hicks, Falling Into the Sky
Tina Holden, Polymer Clay Bytes!
Shelly Joyce, Au jour le jour
Carolyn Lawson, Carolyn's Creations
Kathy Lindemer, Bay Moon Design
Susan Lloyd, Designs by Susan
Cynthia Machata, Antiquity Travelers
Kashmira Patel, Sadafule .. always in bloom!
Inge von Roos, Inge's Blog
Kristen Stevens, My Bead Journey
Sonya Stille, Dreamin' of Beads
Christine Stonefield, Sweet Girl Design
Toltec Jewels, Jewel School Friends
Norma Turvey, Moonlit Fantaseas
Sandra Wollberg, City of Brass Stories


Tuesday, October 9, 2012

Preview: My Bead Table Blog Hop

 
I have been reading through the results of other people's blog hops for a while now, waiting to participate - for what, I'm not sure. This time I jumped in when Lisa Lodge of Pine Ridge Treasures announced her "My Bead Table Blog Hop."
 
When I received the package, I was in for a surprise. Hot pink? Neon yellow? Not in my wheelhouse AT ALL. Did I make a mistake doing this? I decided to embrace the colors and use the opportunity to work and think out of the box. WAY out of the box.
  
Color Palette of Bead Table Blog Hop beads
 Being new at this, I did not take a photo of the beads when they arrived (I know, definitely a beginner's mistake). To give you an idea of the colors, I created a color palette of the beads I received from Lisa, and I pixelated a photo of one of the finished pieces.
Pixelated photo of one of the jewelry designs I created for the reveal
So that's it. A hint of what's to come on Saturday. I hope you are intrigued enough to see what I have done with the bright palette of beads that I received. Set aside some time on Saturday - there are lots of participants!

Saturday, September 15, 2012

The Raven

Original Mixed Media Pendant - "Nevermore"
 Once upon a midnight dreary, while I pondered, weak and weary,
Over many a quaint and curious volume of forgotten lore –
While I nodded, nearly napping, suddenly there came a tapping,
As of some one gently rapping, rapping at my chamber door –
"'Tis some visitor," I muttered, "tapping at my chamber door –
Only this and nothing more."

Ah, distinctly I remember it was in the bleak December;
And each separate dying ember wrought its ghost upon the floor.
Eagerly I wished the morrow; – vainly I had sought to borrow
From my books surcease of sorrow – sorrow for the lost Lenore –
For the rare and radiant maiden whom the angels name Lenore –
Nameless here for evermore.

And the silken, sad, uncertain rustling of each purple curtain
Thrilled me – filled me with fantastic terrors never felt before;
So that now, to still the beating of my heart, I stood repeating,
"'Tis some visitor entreating entrance at my chamber door –
Some late visitor entreating entrance at my chamber door; –
This it is and nothing more."

Presently my soul grew stronger; hesitating then no longer,
"Sir," said I, "or Madam, truly your forgiveness I implore;
But the fact is I was napping, and so gently you came rapping,
And so faintly you came tapping, tapping at my chamber door,
That I scarce was sure I heard you" – here I opened wide the door; –
Darkness there and nothing more.

Deep into that darkness peering, long I stood there wondering, fearing,
Doubting, dreaming dreams no mortal ever dared to dream before;
But the silence was unbroken, and the stillness gave no token,
And the only word there spoken was the whispered word, "Lenore?"
This I whispered, and an echo murmured back the word, "Lenore!" –
Merely this and nothing more.

Back into the chamber turning, all my soul within me burning,
Soon again I heard a tapping somewhat louder than before.
"Surely," said I, "surely that is something at my window lattice;
Let me see, then, what thereat is, and this mystery explore –
Let my heart be still a moment and this mystery explore; –
'Tis the wind and nothing more!"

Open here I flung the shutter, when, with many a flirt and flutter,
In there stepped a stately Raven of the saintly days of yore;
Not the least obeisance made he; not a minute stopped or stayed he;
But, with mien of lord or lady, perched above my chamber door –
Perched upon a bust of Pallas just above my chamber door –
Perched, and sat, and nothing more.

Then this ebony bird beguiling my sad fancy into smiling,
By the grave and stern decorum of the countenance it wore,
"Though thy crest be shorn and shaven, thou," I said, "art sure no craven,
Ghastly grim and ancient Raven wandering from the Nightly shore –
Tell me what thy lordly name is on the Night's Plutonian shore!"
Quoth the Raven "Nevermore."
Closeup of Pendant artwork


Much I marvelled this ungainly fowl to hear discourse so plainly,
Though its answer little meaning – little relevancy bore;
For we cannot help agreeing that no living human being
Ever yet was blest with seeing bird above his chamber door –
Bird or beast upon the sculptured bust above his chamber door,
With such name as "Nevermore."

But the Raven, sitting lonely on the placid bust, spoke only
That one word, as if his soul in that one word he did outpour.
Nothing further then he uttered – not a feather then he fluttered –
Till I scarcely more than muttered "Other friends have flown before –
On the morrow he will leave me, as my hopes have flown before."
Then the bird said "Nevermore."

Startled at the stillness broken by reply so aptly spoken,
"Doubtless," said I, "what it utters is its only stock and store
Caught from some unhappy master whom unmerciful Disaster
Followed fast and followed faster till his songs one burden bore –
Till the dirges of his Hope that melancholy burden bore
Of 'Never – nevermore.'"

But the Raven still beguiling my sad fancy into smiling,
Straight I wheeled a cushioned seat in front of bird, and bust and door;
Then, upon the velvet sinking, I betook myself to linking
Fancy unto fancy, thinking what this ominous bird of yore –
What this grim, ungainly, ghastly, gaunt and ominous bird of yore
Meant in croaking "Nevermore."

This I sat engaged in guessing, but no syllable expressing
To the fowl whose fiery eyes now burned into my bosom's core;
This and more I sat divining, with my head at ease reclining
On the cushion's velvet lining that the lamp-light gloated o'er,
But whose velvet violet lining with the lamp-light gloating o'er,
She shall press, ah, nevermore!

Then, methought, the air grew denser, perfumed from an unseen censer
Swung by Seraphim whose foot-falls tinkled on the tufted floor.
"Wretch," I cried, "thy God hath lent thee – by these angels he hath sent thee
Respite – respite and nepenthe, from thy memories of Lenore;
Quaff, oh quaff this kind nepenthe and forget this lost Lenore!"
Quoth the Raven "Nevermore."

"Prophet!" said I, "thing of evil! – prophet still, if bird or devil! –
Whether Tempter sent, or whether tempest tossed thee here ashore,
Desolate yet all undaunted, on this desert land enchanted –
On this home by Horror haunted – tell me truly, I implore –
Is there – is there balm in Gilead? – tell me – tell me, I implore!"
Quoth the Raven "Nevermore."

"Prophet!" said I, "thing of evil – prophet still, if bird or devil!
By that Heaven that bends above us – by that God we both adore –
Tell this soul with sorrow laden if, within the distant Aidenn,
It shall clasp a sainted maiden whom the angels name Lenore –
Clasp a rare and radiant maiden whom the angels name Lenore."
Quoth the Raven "Nevermore."

"Be that word our sign in parting, bird or fiend!" I shrieked, upstarting –
"Get thee back into the tempest and the Night's Plutonian shore!
Leave no black plume as a token of that lie thy soul hath spoken!
Leave my loneliness unbroken! – quit the bust above my door!
Take thy beak from out my heart, and take thy form from off my door!"
Quoth the Raven "Nevermore."

And the Raven, never flitting, still is sitting, still is sitting
On the pallid bust of Pallas just above my chamber door;
And his eyes have all the seeming of a demon's that is dreaming,
And the lamp-light o'er him streaming throws his shadow on the floor;
And my soul from out that shadow that lies floating on the floor
Shall be lifted – nevermore!

"The Raven" by Edgar Allen Poe
First published in January 1845

Thursday, September 13, 2012

Have we met?

I live in a College town of approximately 100,000 halfway between Kansas City and St. Louis - and while it's a great little town, the crafting solutions are limited to Michael's and Hobby Lobby. So I have made tons of jewelry friends via Facebook.

Two of those are Ralph and Maryann Seiler. Maryann-without-an-"e" (as I call her) was one of the first jewelry related people I connected with on FB. Maryann and Ralph live in Arizona and make a living creating "cabs" - cabochons, which are stones without holes. They purchase raw slabs and cut then polish them into absolutely beautiful stones! They are very reasonably priced for the quality stone that you receive, and I love everything I have gotten from them.

Tuesday I read on FB that Ralph and Maryann were travelling in their RV and stopped in Topeka, KS meeting with Dawn Blair, another FB rock friend. Jokingly, I asked if they were coming any further West. Maryann responded that they were going to be in Kansas City the next day and then could come on to Columbia.....really? I was so excited - how often do you get the chance to meet your virtual friends? So we made plans to meet in the afternoon and she would contact me when they got closer.

So around 3:30 I headed out to the Midway Truck Stop (which has its own TV show, by the way) and found the RV with Arizona tags "Rock2cab." For the next hour, we chatted like old friends! Ralph and Maryann entertained me with stories of their trip and stops along the way, and enthralled me with all of the cab beauties laying around within a fingertips' reach....it was hard not to just reach out and touch all the pretties.....

As we were wrapping up our visit, I asked to see one of the rocks that Maryann had just posted on FB this week - a beautiful Gary Green or Larsonite cab that looked like the surf. While Ralph got it out, Maryanne mentioned that I get $20 off just for coming to visit. Woo hoo!! I was more than willing to visit them for free! Plus, I got to pick a discount chip - 25% off! I didn't find out until later that there was a 50% off chip in the basket, I would have dug harder.


I picked 4 rocks and I can't wait to start working with them! The Gary Green cab is the one at the bottom.


Before we left, Ralph took a photo of Mary Anne and Maryann. Don't judge our hair, it was a very windy day!!


I had a great time meeting Ralph and Maryann. Ralph reminded me of my dad. I told him not to worry, that was a good thing!


You can see their work at www.cabochon.ws

Monday, August 6, 2012

Finally! A Workable Earring Display

Note: this is a long post with lots of photos. It has been quite the saga to get a working Earring Display that I was satisfied with. Remember, you've been warned!

I have struggled for months on how to display my earrings when doing shows. At my very first show last Decmeber, I put them in little baggies. I quickly learned that people had to pick them up, take them out (which can be hard) to even see if they liked them. So I nixed that idea.

For the weekly North Village Farmer’s and Artisan’s Market, I tried earring cards with my business card info at the top punched with 2 holes. Worked better – but now, how to display them? I should hang them! I bought a black metal accordian fold earring holder with hooks from Hobby Lobby. I tried to make that work for a while, but… it would blow over in even a slight wind. It was only 9 inches tall, so it sat too low for a good view, even when elevated. The accordian fold made it hard to see the earrings closest to the hinge. Okay, failure number 2.

So 2 weeks ago, I went with just laying them down on an elevated box – I considered it unprofessional but the best for now. The vendor next to me had a booth full of shabby chic tables and signs her husband made from reclaimed wood. One was an inverted v-shaped display she used for a sign. Perfect! I could hang earrings form that! I asked if he could make one for me, and on the spot, he gave me hers for $5.00. I told him he’d better make her another one!

So here is how I converted the sign holder into the perfect earring display.
I headed to my favorite hardware store – they have such knowledgeable staff! At first I wanted a continuous hinge, but the staff guy said the wood was too thin for the length of the screws (this is why I go to this hardware store, I wouldn’t have thought about that). So I picked a smaller hinge with shorter nails. Even with the shortest screws, I needed a shim to keep the screws from going through – so off to the Balsa wood section, where I got 2 sections – one slat to put behind the hinges, and one thicker, more square piece to go behind the lace from my stash. Add some thumb tacks, and I was ready to go.

1.      I took off the old “hinge” – duct tape! Fortunately, it didn’t leave a residue.

2.      I marked the wider piece of Balsa wood to a bit less than the width of the sign. By the way, Balsa wood is soft enough to cut with scissors. I added a little wood glue, and stapled the wood to the sign on the ends.


3.      I eyeballed the hinge placement and marked the holes. No need to drill with Balsa wood, just start screwing them in!
4.      Next, I laid earring cards on the front for row placement and marked the location with masking tape. I decided on 5 rows and 3 columns.

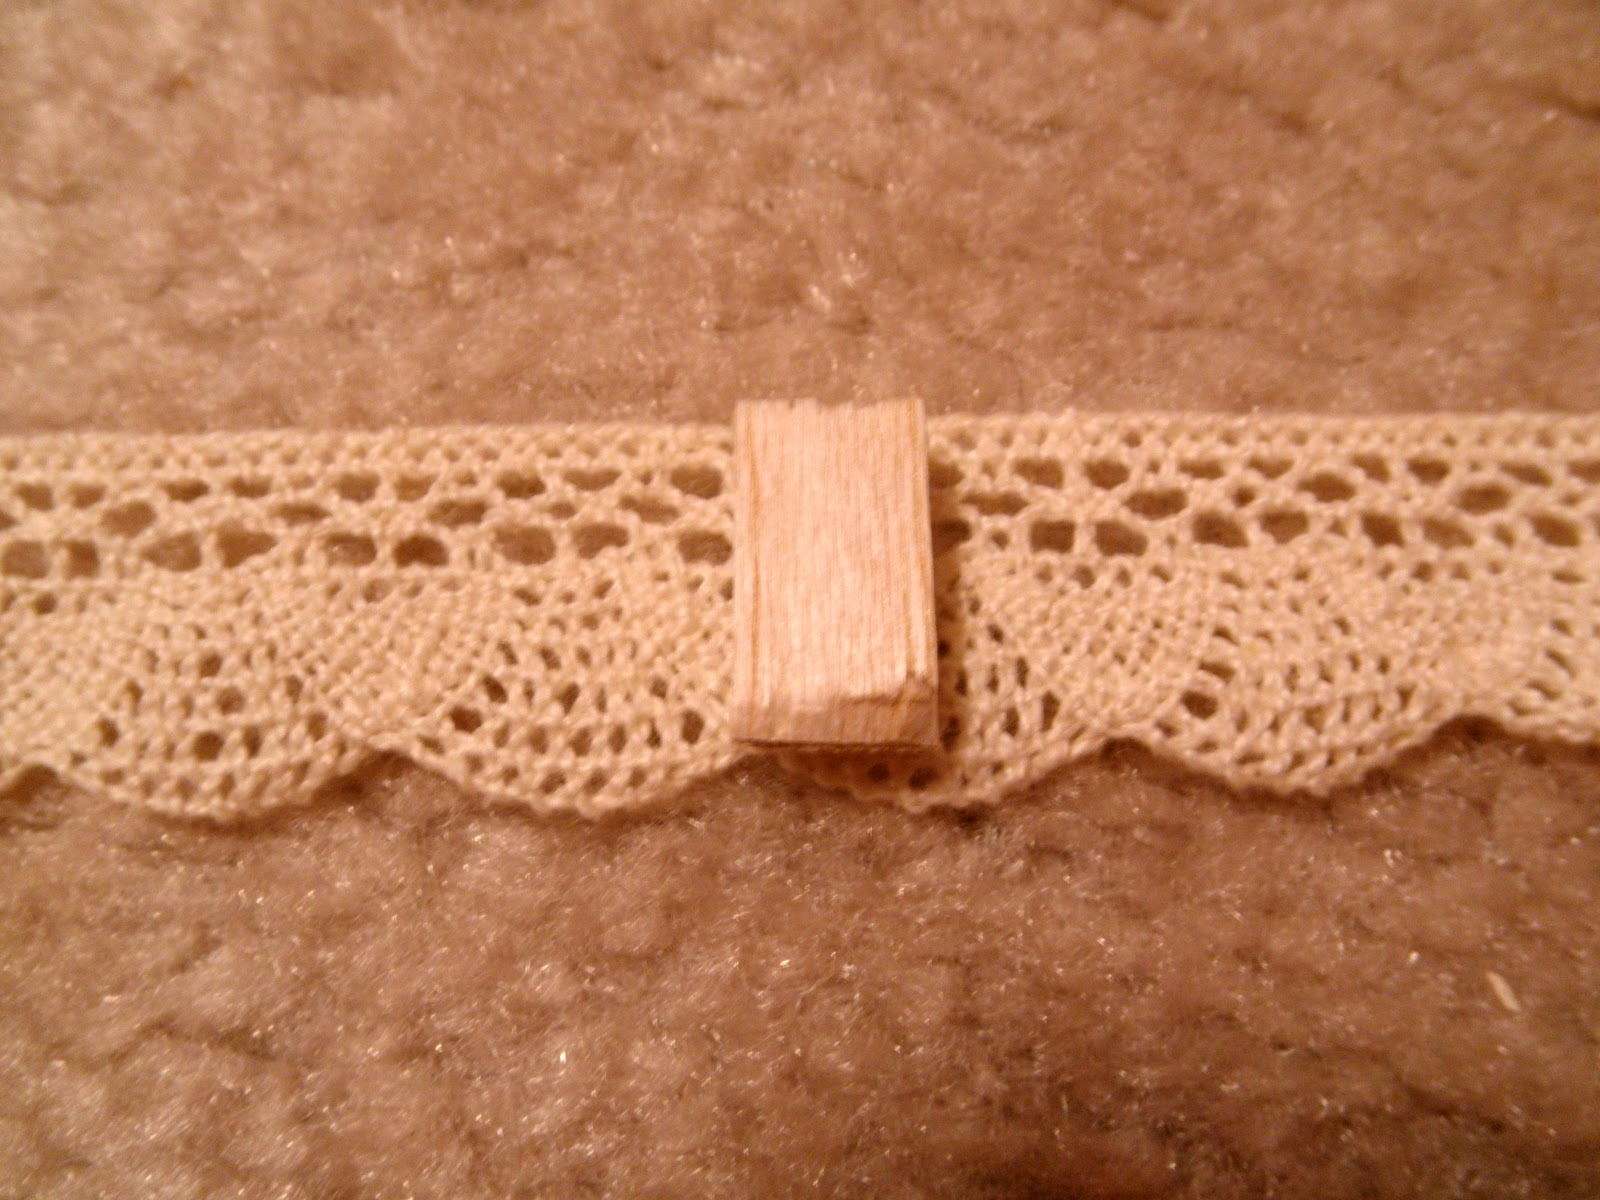
5.      I cut 5 lengths of the sturdiest lace in my stash, about 2” longer on each side. I wanted the lace to be elevated off the wood to make clipping the earrings easier. I cut the square piece of Balsa wood into small strips to go behind the lace.
6.      At first, I thumb tacked the Balsa pieces to the wood without attaching it to the lace. But the earring cards were heavy enough to cause the lace to droop. Plus, I was worried about holes in the wood in case I changed my mind on how to use it. So I used “Pop Dots” from my stash – a scrapbooking double-stick circle that makes things stand out. I cut each circle in fourths and put one on the back and the front of each piece of Balsa wood and placed them on the sign. I used 4 pieces to each row, and I finished a row at a time.


7.      After stretching the lace over the Balsa wood pieces, I turned the sign over and with another 1” piece of the flat Balsa wood, tucked the lace under and attached with 2 thumb tacks. Due to the shim at the top, I cut the 1” piece of Balsa wood in half and abutted it to the previous piece of wood.


This is what the back looked like when I was all finished.
I used it this weekend, and it worked even better than I expected! I am so happy with how it turned out (don't look at how crooked the earrings are hanging, okay?). The tiny clothespins (available at Michael's) can sometimes twist, but otherwise they work just fine.
~ The End ~
See? I told you it was long! Congratulations if you made it to the end.

Monday, July 23, 2012

A better "weigh" for my Jewelry Booth

About twice a week, I have a jewelry booth at the North Village Farmer's and Artisan's Market held every Sunday in downtown Columbia.

Two weeks ago, I had a booth disaster.  I mean a disaster. Wind gust + Tent without weights + tall displays = VERY bad results. Tent went flying, jewelry and stands went flying. That was the last straw in a windy day where I was literally standing over the necklace stands with my hands in the "ready" position trying to keep them from falling over.

My booth neighbor said that I should make little weights for my stands from cut off jean legs.

AHA...I knew there was a reason that I bought that box of denim jeans at a church yard sale 10 years ago, and kept it in a closet!

And so, the Upcycled Jewelry Stand Weights were born.


I immediately went home and cut off a 6" length (or so) of the straightest pant legs I could find in the box. I laid the cut edge of the pant leg up to the vertical piece in the necklace stand, and marked the position and the length with pins. I stitched about 1/4" from the edge around the markings, then trimmed a "U" shape after stitching. I filled it with plain popcorn (the cheapest was the 2 lb. bag from Wal-Mart) and stitched the hemmed edge.

If I were going to an upscale show, I would consider making them out of black and turning them so the raw edges didn't show, but you couldn't see them from the front anyway. They were perfect for an outdoor market! I made a total of four: 2 with notches, and 2 square for my tray stands.

If you can sew a straight stitch, you can make these. They don't have to be out of denim, you could use anything heavy enough you have laying around.

I didn't even bother changing the thread (I had turquoise in my sewing machine) or finishing the raw edges.

My booth neighbor Mary said they look like britches. I think she's right!


They saved the day, because there was some good wind yesterday as well.