Showing posts with label Earrings. Show all posts

Monday, May 20, 2013

May Earring Swap Blog Hop Reveal

Today was supposed to be the reveal for a May Earring Swap Blog Hop hosted by Jessica Murray of Whimsical Monkey Artisan Jewelry. However, on Friday a few bad apples harassed her about the few rules that there were (3 people, really?) and she canceled the reveal with a very bad taste in her mouth. Many of us decided to go ahead and post about the earrings we sent and received, and I decided to do so as well.

My partner was Marde Lowe of FanciMar Designs. We exchanged emails and I checked out her web page and Facebook page, but she said she wasn't sure she had a personal style, so I sort of went on my own for designs. On to my favorite place for inspiration, Pinterest!

I found a wire wrapped earring I really liked on a Hungarian website (pinned here) - a lot of the blog posts had photo tutorials on them, but this post just had a link that no longer went anywhere (sigh). But by checking the comments, I found out the design was based on a PIPA Chinese knot. With that, I ran a Google search and found an illustrated knot site for the PIPA Chinese knot that I could follow here. After about 2 practice rounds with 16 gauge Copper, I actually made earrings that were the same size and didn't have a ton of tool marks on them! I topped them with a multicolor lampwork bead and a light blue Swarovski bicone. I put them on long kidney wire hooks to finish them.


Because most blog hoppers send extras, I made a second pair too, with Czech beads. They are in Copper too, but a more simple style (my fingers couldn't handle any more wire work, LOL). I made a swirl on the front of the diamond striped beads but that's as fancy as I got. Still, I think they're pretty nice!


Marde sent me 2 beautiful blue pairs of earrings! I really like the dangle earrings. Better watch out for me when I wear those Evil Eye ones, too.


I am still including the list of original participants. Like I said, many of them planned to still post, but not all. Hopefully you will see a few earrings if you pop around!

Blogs:
Inge von Roos: ingetraud.wordpress.com
Nancy Smith: wirednan.blogspot.ca
Miranda Ackerley: http://blog.mirandack.com/
Shelley Graham Turner: www.shelleygrahamturner.blogspot.com
Ginger Davis Allman: http://thebluebottletree.com/
Mary Anne Flesch: www.handcraftedserenity.blogspot.com  **You are here
Nicole Valentine Rimmer: www.nvalentine.blogspot.com
Stephanie Weiss: uniquelymebwd.blogspot.com/
Spun Sugar Beadworks: Spunsugarbeadworks.blogspot.com
Tania Spivey: http://moobiegrace.blogspot.com/

Facebook Pages:
 
Beccy Peterson: Beccy's Baubles
Ani Forsyth: Veil Dancer
Marde Lowe: FanciMar Designs

Friday, December 7, 2012

Holly Berry Eyepin - a Quick Tutorial

I thought I would share with you how to make a Holly Berry headpin to top a pair of earrings. Sorry for the quality of some of the photos, it is really hard to photograph your own tutorial, especially with your left hand! I used the headpin to make a quick pair of Holly leaf and berry earrings.
For each headpin, you need 3 4mm red pearls and one 2" headpin. I used silvertone, but copper or brass would work just as well.

String the 3 pearls on the headpin so that the leftmost pearl ends at about the halfway point on the headpin.

Bend the right side of the headpin over to the left, as shown in the photo. You will need a slight bit of space between the pearls to bend the headpin all the way up.
Bend the left side of the headpin over to the right, making sure to go BEHIND the previously bent end. The right side will end up at the bottom, so you want it on the back side of the cluster.
Continue to bend both sides until the head side of the pin is flat and the right side is bent straight down. A triangle will form with the pearl berries. The right photo shows the headpin from the back - and of course that's the photo that is actually in focus!

Front side
Reverse side
Cut off the top of the headpin. Trim and make a loop at the top. Straighten out the loop and the back wire if necessary.

That's it, you're finished! Your Holly Berry headpin is ready to use however you'd like. I hope you enjoyed this tutorial - please let me know if you find it useful!
Finished headpin
 

Saturday, October 13, 2012

Reveal: My Bead Table Blog Hop

Today is the reveal for Lisa Lodge's My Bead Table Blog Hop. Lisa sent us a (large) package of random coordinating beads, and along with things in our stash (stash only! no purchasing! that was the rules), we were to use as much as we could and Create.

Finally, the package arrived and inside I found a large bag of glass, seed beads, gemstone chips, some findings and large acrylic petals. The color scheme? Hot Pink. Bright Yellow. Black. White. The acrylic petals were big, over an inch tall. She also included 2 chicken beads - that's right, CHICKENS. What am I supposed to do with chickens? 

Bawk, bawk!

I have never worked with acrylic beads, and bright pink and yellow aren't colors that I usually work with. Ever. Fortunately, they came about 4 weeks earlier so I had time. I put them aside, and every time I passed by them, I thought about what to do.

When October rolled around, I knew it was time to get started actually using the beads. Still confused about what to do with these bright beads, finally something hit me. It's October, and I have a mix of pink beads. I decided to make jewelry to commemorate Breast Cancer Awareness.

The first thing I made was a Memory Wire bracelet. Whew, already the pressure was lighter - I used a lot of beads on this one! P.S.: this is the photo I pixellated for my preview post earlier this week. I actually like this bracelet and the color combo! It turns out all I needed to do was just begin.
First design, Memory Wire bracelet

Then I started on a necklace. I wanted a long necklace with a dangling pendant. There was a large white Howlite bead that was perfect as the foundation for the pendant. I used a variety of beads to make the dangles of various lengths. To continue with the Breast Cancer Awareness theme, I made a beaded pink ribbon out of seed beads and 28 ga. wire. I have some interesting crinkle stringing wire from Beadalon that I used for the lower beaded part. To show off the wire, I used crimp beads to space the beads. The remainder of the necklace is silver tone chain, and I finished it off with an "S" clasp that was part of the bead mix. It is very long, hanging well past the bust line. Perhaps that's why I had a really hard time getting a photo of this necklace. I am still not happy with the final photos, and I may try again this weekend depending on the lighting.


Time to make some earrings. I used the leftover chain from the necklace to make a quick pair of pink and yellow drop earrings with the small rhinestone beads.
Drop earrings in pink and yellow
I used 2 of the peach acrylic petals for a second pair of earrings. At first, I tried to use an eyepin through the top hole with another loop lower on the pin. I bent the middle to match the curve of the bead. It didn't hang well AT ALL! It looked terrible. After about 3 times, I tried a jumpring through the top, and I attached the eyepin to that. That worked exactly like I wanted. I love the look of these earrings especially with the heart charm, but they clack a little when you wear them.

Peach acrylic petal and crystal drop earrings
 
This second necklace is my favorite. The pink and brown button above the acrylic petal and the black and white leaf button are part of a closeout set of wooden buttons that I got on Etsy. Along with a caramel colored crystal rondelle and various leaf beads in my stash, it works for me. I wish I could get the petal to quit spinning around. I am going to play with the jump rings some more this weekend.


I had one more project planned, but I just ran out of time. It is the last hot pink acrylic petal filled with resin and a Pink Ribbon oval with a few pink glitter hearts sprinkled in. I intend to finish it with a simple chain and a pink ribbon accent above the petal pendant.


These was one casualty - a broken glass heart...I broke it trying to tighten up the loop I made at the top. It split right in half! I wasn't happy either, I really wanted to use it. I guess I don't know my own strength.
My broken heart

All in all, I am happy with how everything turned out for this Blog Hop. I like the designs I came up with, I made 4 1/2 pieces of jewelry and I used a lot more beads than I ever thought I would when the package arrived that's for sure.

But I still don't know what I'm going to do with the chicken beads. If you know a chicken lover, let me know - I'll send you some beads.

Please be sure and visit all the Blog Hop participants to read their story and see their designs!

Host: Lisa Lodge, Pine Ridge Treasures
Molly Alexander, Beautifully Broken Me
Audrey Belanger, Dreams of an Absolution
Ginger Bishop, lilmummy likes...
Tanya Boden, Fusion Muse
Lisa Boucher, Lisa’s Clay Happenings
Michelle Buettner, Mishel Designs
Eleanor Burian-Mohr, The Charmed Life
Mikala Coates, Maybe Just Perhaps
Marlene Cupo, Amazing Designs
Kathleen Douglas, Washoe Kat's
Mary Anne Klinglesmith Flesch, Handcrafted Serenity  *you are here
Therese Frank, Therese's Treasures
Mary Govaars, MLH Jewelry Designs
Tanya Goodwin, A Work in Progress
Mary Hicks, Falling Into the Sky
Tina Holden, Polymer Clay Bytes!
Shelly Joyce, Au jour le jour
Carolyn Lawson, Carolyn's Creations
Kathy Lindemer, Bay Moon Design
Susan Lloyd, Designs by Susan
Cynthia Machata, Antiquity Travelers
Kashmira Patel, Sadafule .. always in bloom!
Inge von Roos, Inge's Blog
Kristen Stevens, My Bead Journey
Sonya Stille, Dreamin' of Beads
Christine Stonefield, Sweet Girl Design
Toltec Jewels, Jewel School Friends
Norma Turvey, Moonlit Fantaseas
Sandra Wollberg, City of Brass Stories


Monday, August 6, 2012

Finally! A Workable Earring Display

Note: this is a long post with lots of photos. It has been quite the saga to get a working Earring Display that I was satisfied with. Remember, you've been warned!

I have struggled for months on how to display my earrings when doing shows. At my very first show last Decmeber, I put them in little baggies. I quickly learned that people had to pick them up, take them out (which can be hard) to even see if they liked them. So I nixed that idea.

For the weekly North Village Farmer’s and Artisan’s Market, I tried earring cards with my business card info at the top punched with 2 holes. Worked better – but now, how to display them? I should hang them! I bought a black metal accordian fold earring holder with hooks from Hobby Lobby. I tried to make that work for a while, but… it would blow over in even a slight wind. It was only 9 inches tall, so it sat too low for a good view, even when elevated. The accordian fold made it hard to see the earrings closest to the hinge. Okay, failure number 2.

So 2 weeks ago, I went with just laying them down on an elevated box – I considered it unprofessional but the best for now. The vendor next to me had a booth full of shabby chic tables and signs her husband made from reclaimed wood. One was an inverted v-shaped display she used for a sign. Perfect! I could hang earrings form that! I asked if he could make one for me, and on the spot, he gave me hers for $5.00. I told him he’d better make her another one!

So here is how I converted the sign holder into the perfect earring display.
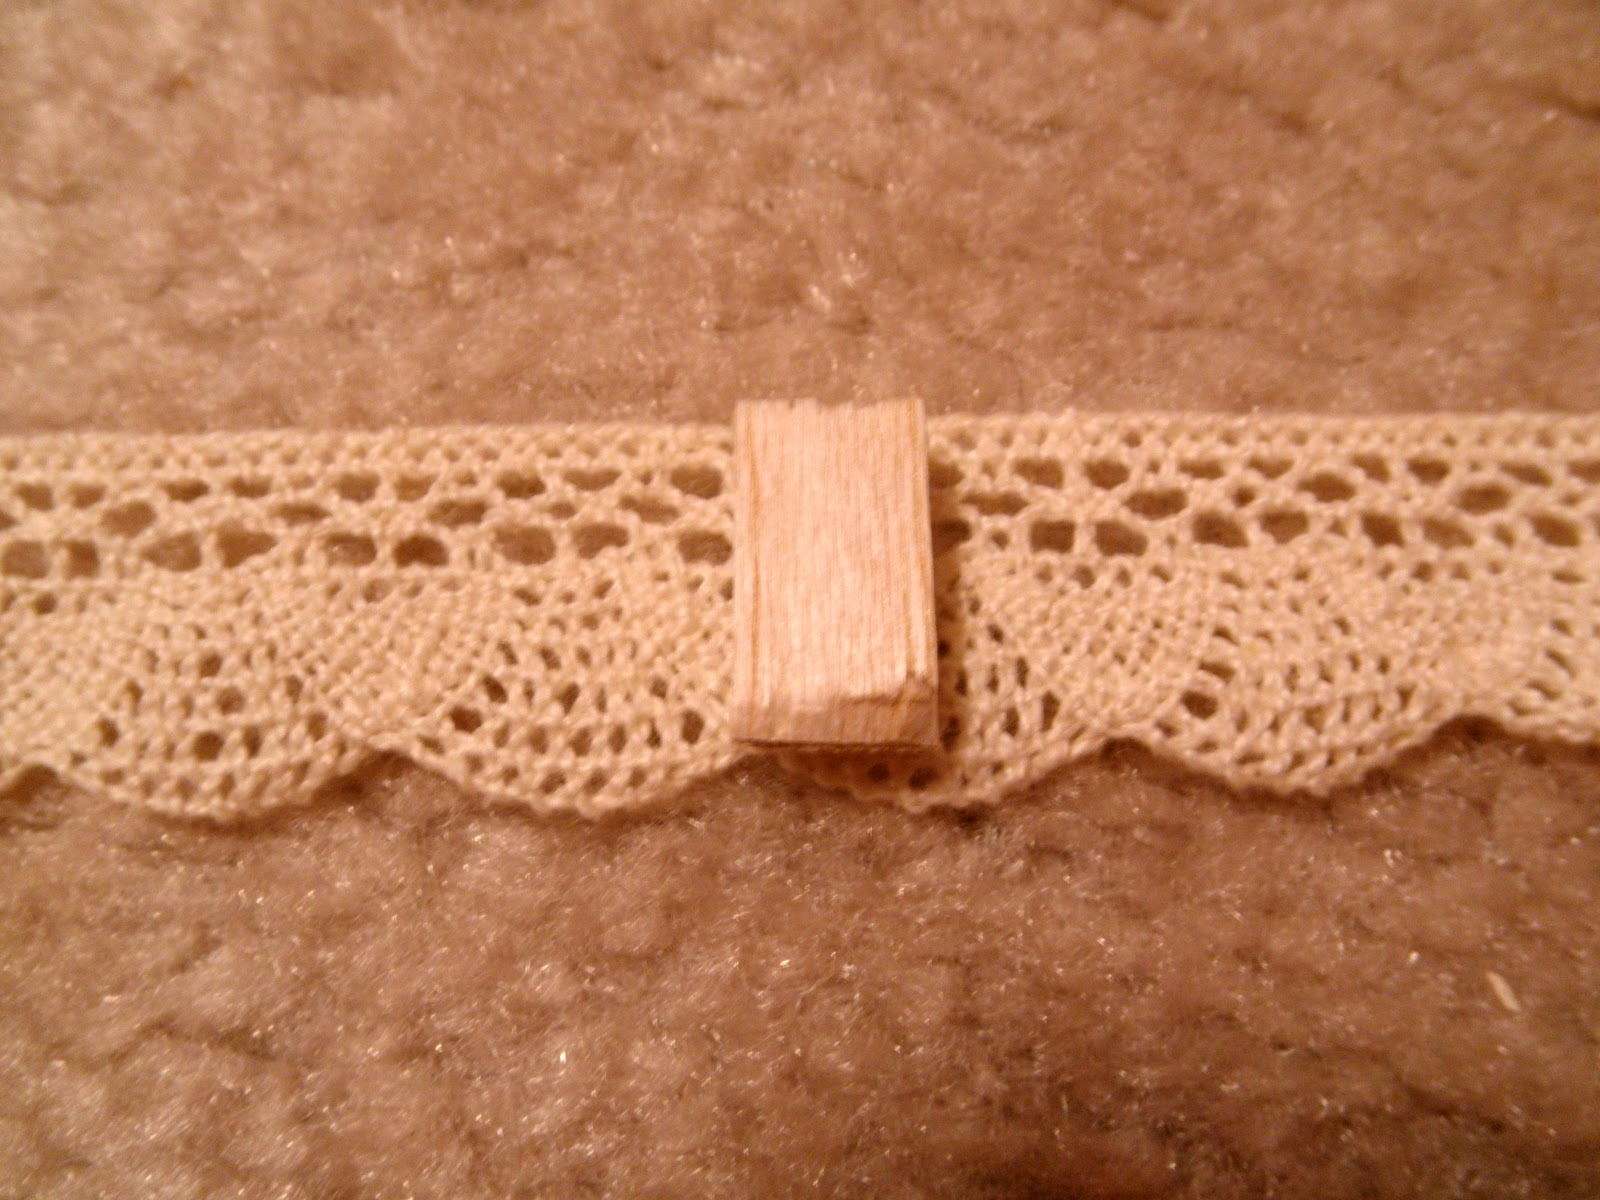
I headed to my favorite hardware store – they have such knowledgeable staff! At first I wanted a continuous hinge, but the staff guy said the wood was too thin for the length of the screws (this is why I go to this hardware store, I wouldn’t have thought about that). So I picked a smaller hinge with shorter nails. Even with the shortest screws, I needed a shim to keep the screws from going through – so off to the Balsa wood section, where I got 2 sections – one slat to put behind the hinges, and one thicker, more square piece to go behind the lace from my stash. Add some thumb tacks, and I was ready to go.

1.      I took off the old “hinge” – duct tape! Fortunately, it didn’t leave a residue.

2.      I marked the wider piece of Balsa wood to a bit less than the width of the sign. By the way, Balsa wood is soft enough to cut with scissors. I added a little wood glue, and stapled the wood to the sign on the ends.


3.      I eyeballed the hinge placement and marked the holes. No need to drill with Balsa wood, just start screwing them in!
4.      Next, I laid earring cards on the front for row placement and marked the location with masking tape. I decided on 5 rows and 3 columns.

5.      I cut 5 lengths of the sturdiest lace in my stash, about 2” longer on each side. I wanted the lace to be elevated off the wood to make clipping the earrings easier. I cut the square piece of Balsa wood into small strips to go behind the lace.
6.      At first, I thumb tacked the Balsa pieces to the wood without attaching it to the lace. But the earring cards were heavy enough to cause the lace to droop. Plus, I was worried about holes in the wood in case I changed my mind on how to use it. So I used “Pop Dots” from my stash – a scrapbooking double-stick circle that makes things stand out. I cut each circle in fourths and put one on the back and the front of each piece of Balsa wood and placed them on the sign. I used 4 pieces to each row, and I finished a row at a time.


7.      After stretching the lace over the Balsa wood pieces, I turned the sign over and with another 1” piece of the flat Balsa wood, tucked the lace under and attached with 2 thumb tacks. Due to the shim at the top, I cut the 1” piece of Balsa wood in half and abutted it to the previous piece of wood.


This is what the back looked like when I was all finished.
I used it this weekend, and it worked even better than I expected! I am so happy with how it turned out (don't look at how crooked the earrings are hanging, okay?). The tiny clothespins (available at Michael's) can sometimes twist, but otherwise they work just fine.
~ The End ~
See? I told you it was long! Congratulations if you made it to the end.